If you haven't done so already, download the MapRun6 App now! Its available for Android and Apple.
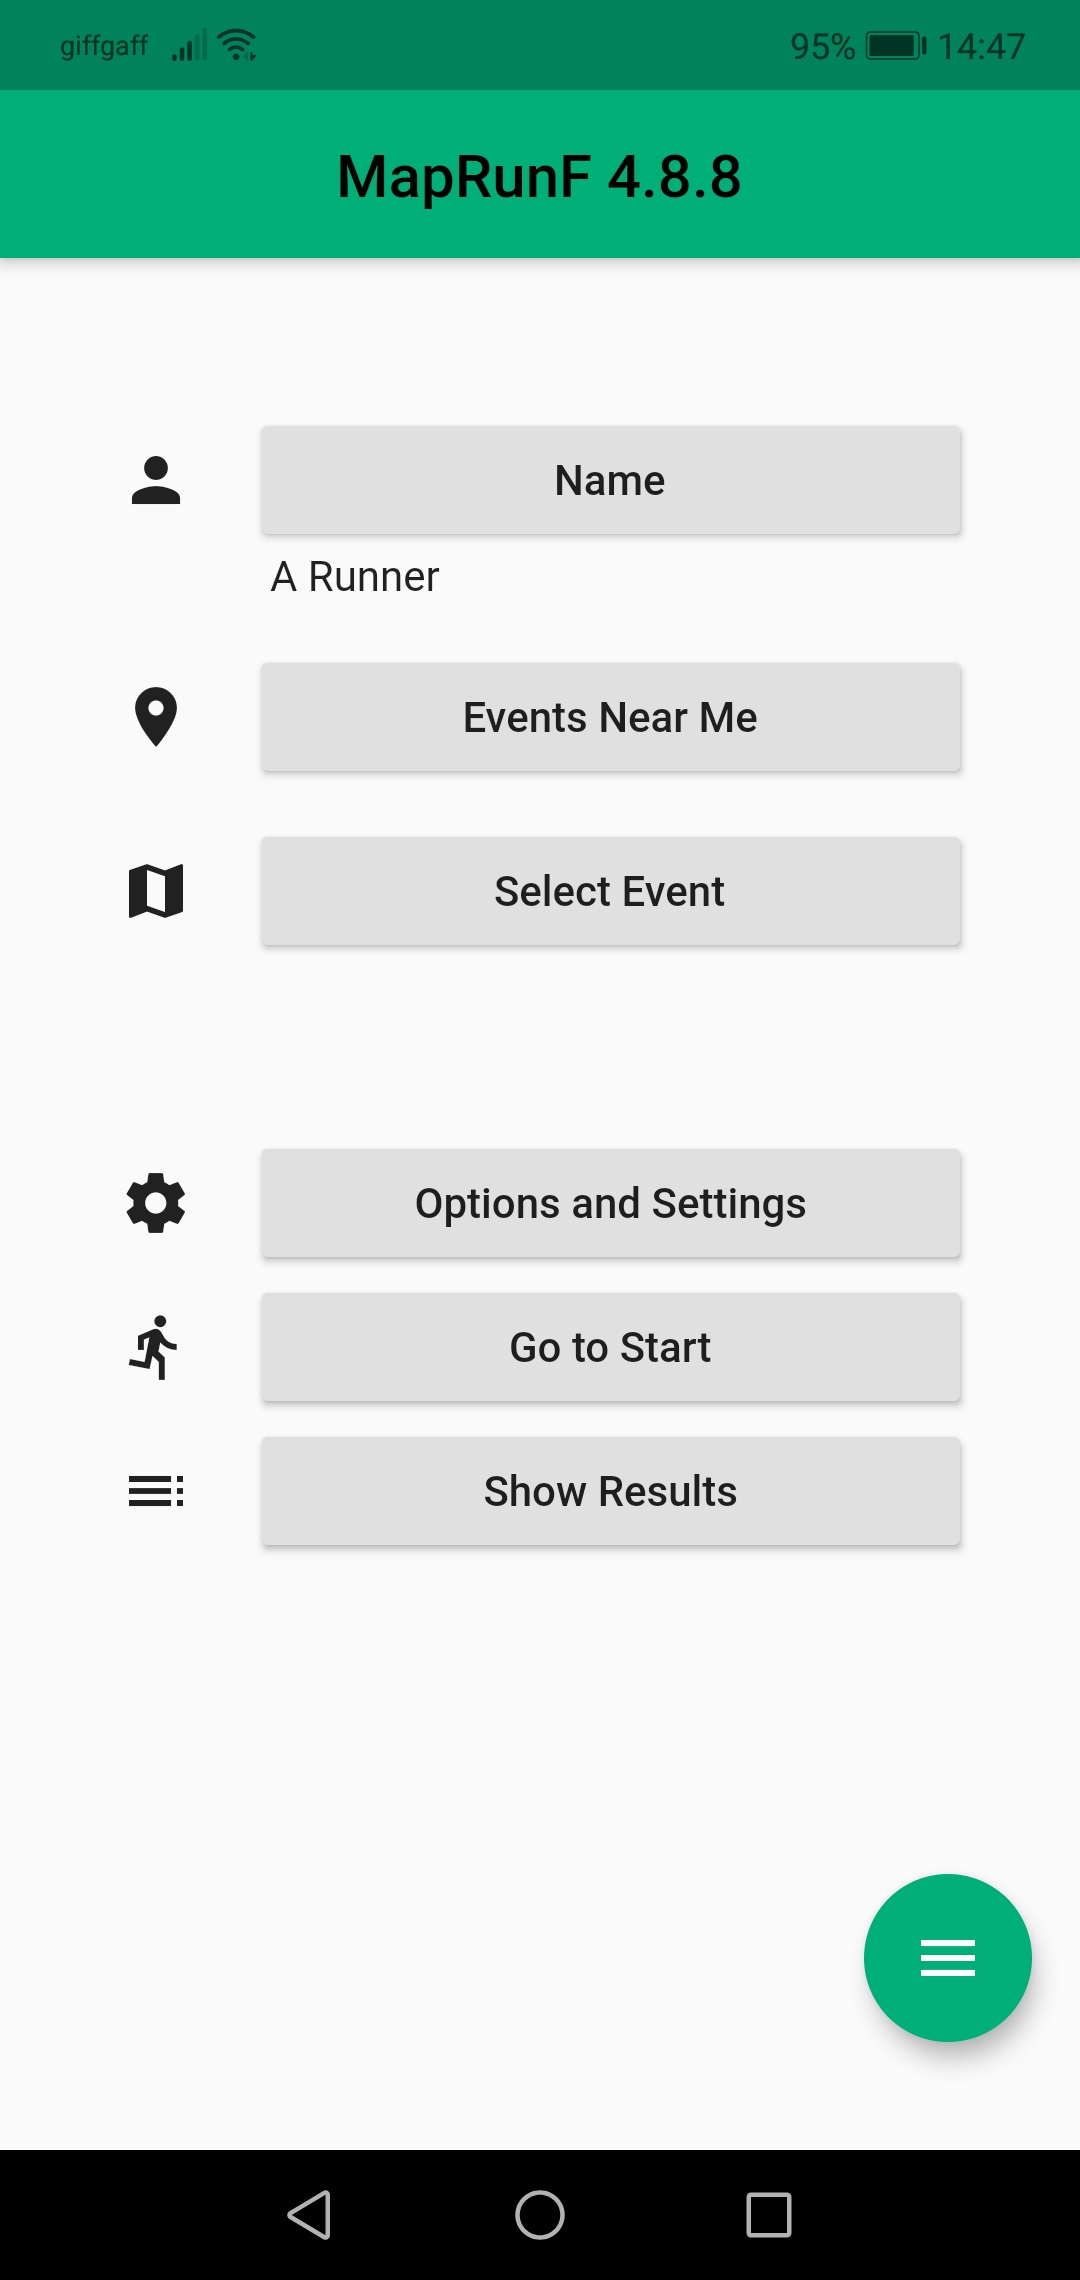
After you have installed the app, open it, you should see a screen as shown on the image. you need to enter a small amount of personal information - name etc. - to identify yourself in the results. Tap on 'Name' and enter the information requested.
You should also check that your phone is correctly set up for maprun. Click here for guidance on phone settings for the maprun app. This document provides additional information on how to do this. However, particularly with Android 'phones, the exact procedure can vary with the Android version and the 'phone manufacturer. Hopefully the actions will be similar.
Now you are ready for your first maprun challenge.Tap 'Select Event' and scroll down to the UK folder, then select Manchester. In the Manchester folder select Navvies. Further details are given in each challenge description. Select the challenge you want to run. Look for the name as described on the individual challenge information. You may be able to find a local event via the 'Events Near Me' button but the definition of 'near' is fairly restricted. Wait for the course and map files to download.
Before you start the challenge, there are some options you may want to configure. Tap on 'Options and Settings' and you will see a long list. Most of these have already been configured and 'locked' for a particular event. However, there are two that you might want to change. If you are less confident about your navigation you may want to select 'Display present location'. This will result in a red 'dot' on the 'phone screen showing where you are on the map at all times. This is particularly helpful if you feel very lost and need to completely relocate. The 'Event allows runners to start at any control' is described in more detail in the 'Challenge Types' link. You may well want to use this. Note that the options may be reset when you download a new event so you need to set them for each event if you don't want to accept the defaults.
Exit from 'Settings' (arrow top left). When you are ready to start the challenge, tap 'Go to Start'. You should be at least 20m from the start point when you do this. The course is now live, and will start logging your track and time when you pass through the Start. Before you pass through and record the Start, your location and track are shown on the screen so that you can see if your GPS is working. At the bottom of the screen your current GPS accuracy is shown. Ideally you should wait for this to turn green before you begin. Do not start if it is red. The accuracy and current location information will disappear once you start (unless you have selected the display location option).
Now enjoy the challenge! When you pass through the start location, your 'phone will 'beep' to confirm that you have located the start correctly. Now every time you locate checkpoints around the course you will also get a confirmation 'beep'. You need to be within about 10 metres of a checkpoint for it to register. The locations have been carefully checked but very occasionally you may fail to get a 'beep' immediately. If this happens, we apologise, but try wandering around!
Remember that you need to visit the Finish and get a 'beep' to stop the timer. Your results should be uploaded automatically to the maprun server. If they are, you will see a prompt on the screen to allow you optionally to upload to strava. If not, you should see a prompt simply to upload results.
Finally, you can compare your results with others on the same challenge, and view the route you took. You'll very quickly get the hang of the technology.
Note that to download the app and the challenge you need to be connected to the internet either via wifi or mobile data. This is also necessary to upload results. However, a connection is not necessary while running the challenge. You can prepare at home and only press 'Go to Start' when you are near your start location and ready to go.